電子工作で離れた場所からコントロールしたいとき、どうしてもWiFiが欲しくなります。
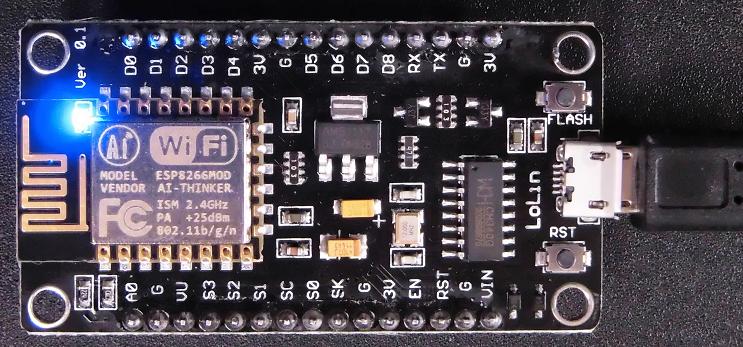
ArduinoのWiFiシールドを探していたところ、このようなモジュールがあることを知りましたが、なんとこれだけでArduinoIDEが使えるようです。
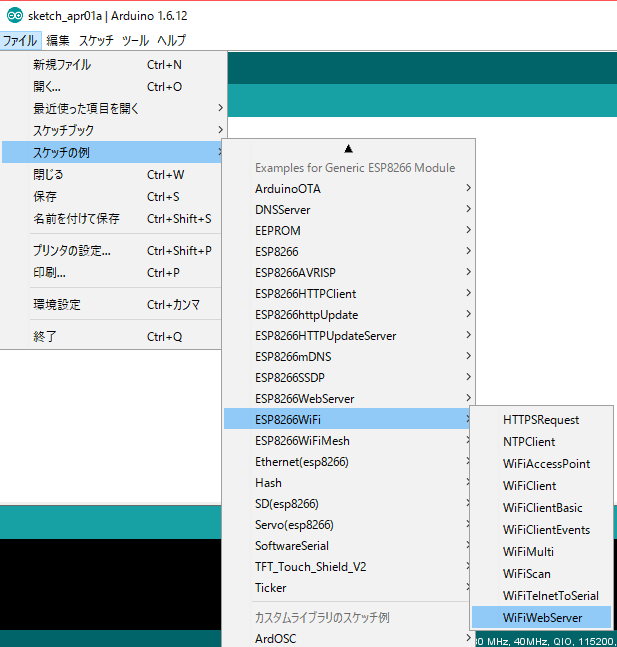
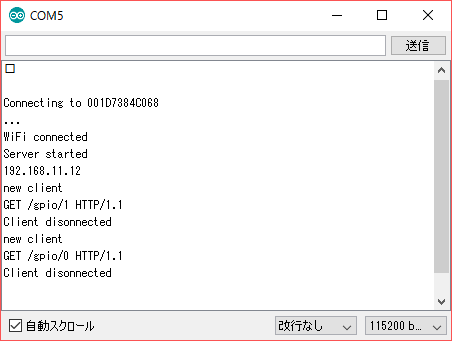
サンプルプロジェクトにあるWebサーバを使って、ブラウザからオンボードのLEDをon/offするテストをしてみました。
|
1 2 3 4 5 6 7 8 9 10 11 12 13 14 15 16 17 18 19 20 21 22 23 24 25 26 27 28 29 30 31 32 33 34 35 36 37 38 39 40 41 42 43 44 45 46 47 48 49 50 51 52 53 54 55 56 57 58 59 60 61 62 63 64 65 66 67 68 69 70 71 72 73 74 75 76 77 78 79 80 81 82 83 84 85 86 87 88 89 90 91 92 93 94 95 96 97 |
/* * This sketch demonstrates how to set up a simple HTTP-like server. * The server will set a GPIO pin depending on the request * http://server_ip/gpio/0 will set the GPIO2 low, * http://server_ip/gpio/1 will set the GPIO2 high * server_ip is the IP address of the ESP8266 module, will be * printed to Serial when the module is connected. */ #include <ESP8266WiFi.h> const char* ssid = "ssid"; const char* password = "password"; // Create an instance of the server // specify the port to listen on as an argument WiFiServer server(80); void setup() { Serial.begin(115200); delay(10); // prepare GPIO2 pinMode(2, OUTPUT); digitalWrite(2, 0); // Connect to WiFi network Serial.println(); Serial.println(); Serial.print("Connecting to "); Serial.println(ssid); WiFi.begin(ssid, password); while (WiFi.status() != WL_CONNECTED) { delay(500); Serial.print("."); } Serial.println(""); Serial.println("WiFi connected"); // Start the server server.begin(); Serial.println("Server started"); // Print the IP address Serial.println(WiFi.localIP()); } void loop() { // Check if a client has connected WiFiClient client = server.available(); if (!client) { return; } // Wait until the client sends some data Serial.println("new client"); while(!client.available()){ delay(1); } // Read the first line of the request String req = client.readStringUntil('\r'); Serial.println(req); client.flush(); // Match the request int val; if (req.indexOf("/gpio/0") != -1) val = 0; else if (req.indexOf("/gpio/1") != -1) val = 1; else { Serial.println("invalid request"); client.stop(); return; } // Set GPIO2 according to the request digitalWrite(2, val); client.flush(); // Prepare the response String s = "HTTP/1.1 200 OK\r\nContent-Type: text/html\r\n\r\n<!DOCTYPE HTML>\r\n<html>\r\nGPIO is now "; s += (val)?"high":"low"; s += "</html>\n"; // Send the response to the client client.print(s); delay(1); Serial.println("Client disonnected"); // The client will actually be disconnected // when the function returns and 'client' object is detroyed } |
逆ですが、LowでLEDが光ります。
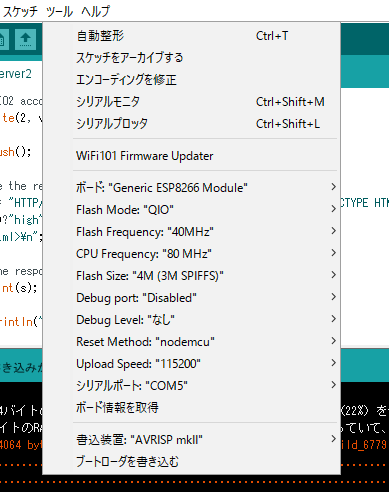
ライブラリのインストールには、
http://arduino.esp8266.com/versions/2.3.0/package_esp8266com_index.json
を環境設定のAdditional Boards Manager URLsに設定します。
(設定したのがしばらく前で参照元をわすれました^^;)
ArduinoIDEは、いろいろとそろっていて便利です。


